What are the steps to install a cellular network adapter card?
Introduction
Installing a cellular network adapter card can significantly enhance your device’s connectivity options, offering reliable internet access in areas where Wi-Fi may not be available. This guide will walk you through the detailed steps of installing a cellular network adapter card, ensuring you can complete the process with confidence.
Tools and Materials Required
- Cellular network adapter card
- Screwdriver set
- Anti-static wrist strap
- User manual of your device
- SIM card (if required)
Step-by-Step Guide to Install a Cellular Network Adapter Card
Step 1: Shut Down and Unplug Your Device
Before you start the installation, make sure to turn off your device and unplug it from the power source. This is a critical safety measure to avoid electric shocks or damage to your computer components.
Step 2: Disassemble Your Device
Using the appropriate screwdriver, carefully remove the screws from your device’s case to access the internal components. Refer to your device’s user manual for specific instructions on how to open it.
Step 3: Locate the PCIe Slot
The cellular network adapter card typically fits into a PCIe slot on your computer’s motherboard. Identify the appropriate slot, usually labeled as “PCI Express” or “PCIe” slot in the manual.
Step 4: Ground Yourself
To protect your device’s internal components from static electricity, it is vital to ground yourself. Wear an anti-static wrist strap and attach it to a metal part of the computer case.
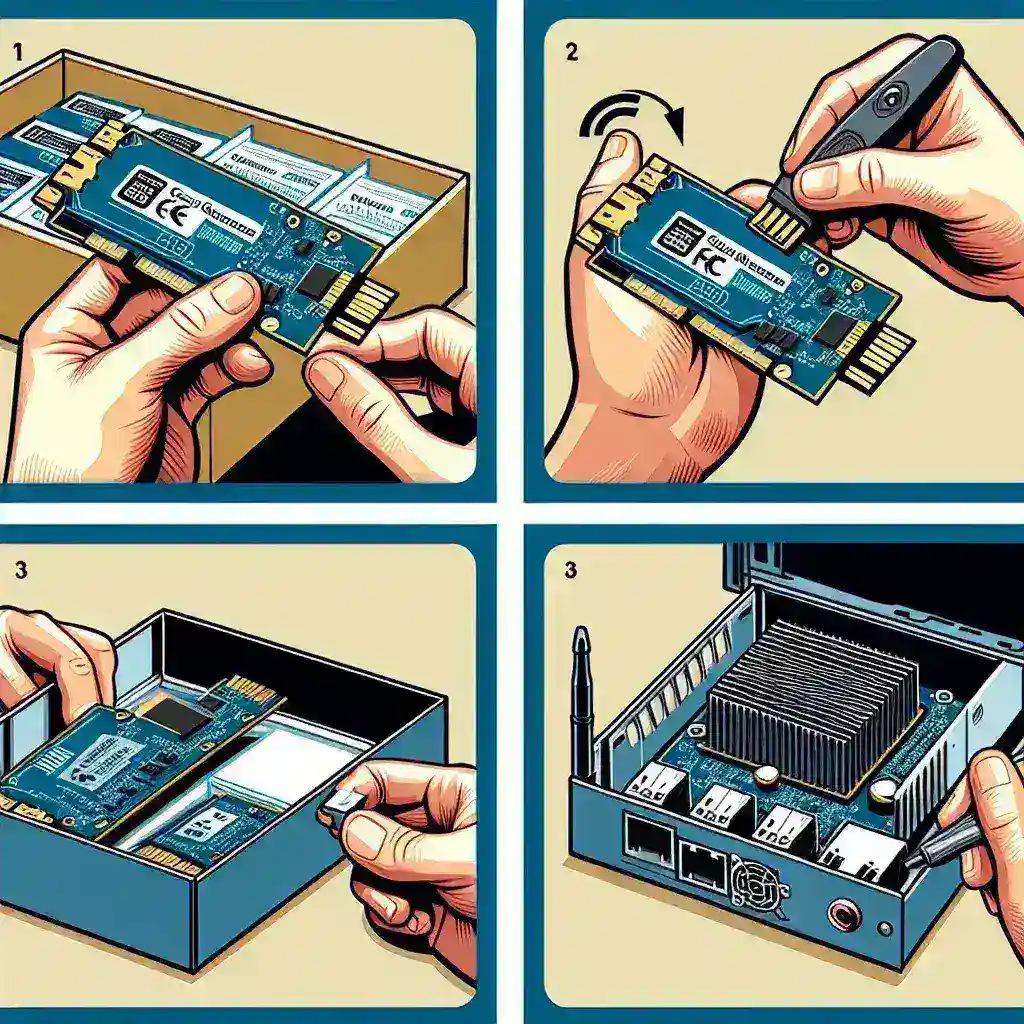
Step 5: Install the Card
- Gently insert the cellular network adapter card into the PCIe slot, making sure it is properly aligned.
- Press down firmly until the card is fully seated in the slot.
- Screw the card bracket into place to secure it.
Step 6: Insert the SIM Card (if required)
If your cellular network adapter card requires a SIM card, insert it into the designated slot on the card. Follow the manufacturer’s instructions for proper placement and orientation of the SIM card.
Step 7: Reassemble Your Device
Once the card is properly installed, carefully reattach the case and screw it back into place.
Step 8: Power Up Your Device
Plug your device back into the power source and turn it on. Your device should recognize the new hardware automatically.
Step 9: Install Necessary Drivers
After the device powers up, you might need to install drivers for the cellular network adapter card. These drivers can typically be downloaded from the manufacturer’s website or included on a CD that comes with the card.
Step 10: Configure the Adapter Card
Once the drivers are installed, configure the adapter card using your device’s network settings. Setup the cellular connection according to your ISP’s instructions.
Troubleshooting Tips
- If your device does not recognize the card, double-check that the card is properly seated in the PCIe slot.
- Ensure that your device’s BIOS/UEFI settings have the PCIe slots enabled.
- If the SIM card is not detected, confirm that it is correctly inserted and oriented in the card’s SIM slot.
- Refer to the user manual or support website of your cellular network adapter card for specific troubleshooting steps.
Conclusion
Installing a cellular network adapter card is a straightforward process that can greatly improve your device’s connectivity options. By following the steps outlined in this guide, you can ensure a successful installation and enjoy reliable cellular internet access on your device.
Comparison of Key Components
| Component | Function |
|---|---|
| Cellular Network Adapter Card | Enables cellular connectivity |
| PCIe Slot | Interface slot for the adapter card |
| SIM Card | Provides cellular network access |
| Drivers | Software to ensure the card functions correctly |